Posted on Monday, December 6, 2021Last update

The Mordheim fever took us forward ⚔️

Saturday me and my mates played a Mordheim game using the scenario on Town Cryer #13, The Sword of the Herald. Nice scenario: a glooming green sword in the centre, surrounded by lots of Wyrdstone markers and nice Zombies everywhere.

In the centre the sword and some coins mark the objective. Larger coins means larger shards!

My Orcs are in the down left corner, oppose to Michele's Possessed near the cimitery. On the right, Davide's Dwarves started in the little wood. The coins near the warbands mark the centre of the deployment zone area of 6".

The scenario was randomly chosen by Michele, and we rapidly tried to put it on the board. The result was we misread some rules... we discovered it too late, but the game wasn't really hacked that bad. On the contrary: we liked it. A lot. More on this forward in the post.

The game itself ran smoothly and we had lots of fun. We decided that the Zombies which resurrected near the centre of the table would activate and charge on a radius determined by a die each turn: on turn two they activated on 5" and there were Zombies everywhere!

The Zombie is about to trying a diving charge on the (invisible) Squig under him. Will he succeed?

Answer: no.

The Orcs advance towards the gate

The Possessed start from the graveyard and charge the first Zombies ahead

The Dwarves scatter alongside the walls

In the centre there is a green light fog which prevents model from seeing anything more than 3" from then. The fog covers a radius of 5" from the centre, but there is an additional circle of 3" in which the model can still be sawn from out the fog. The Henchmen can enter and move only if the Leader passes a LD test: scary things live near the rich prizes...

Orcs and Possessed are dangerously on the same route to the centre...

The Dwarven path is full of not-so-dead bodies!

Another Zombie trying to fly


Some activity in the centre: in the fog, the Troll and some Orchish folks kill Zombies everywhere and claim the prizes from the angry Possessed


The Orcs flee with the sword! Orc Boss took the item and run away, followed by the Shaman with a big shard. The Trollslayer do the same and retreat towards his party, while the Possessed are still fighting the greenskins

"Aaaaaaargh!" Finally a Zombie succeeds in a diving charge on the Dwarf Thane! This will not end well, but will surely end cool 

Last turns: lots of Zombies attack the Possessed Magister! Me and Michele decided for a truce: I'm not intended on killing his powerful warrior Sbraaah (the thing with the tentacles), so I let him free from the Squig dental routine

Orc Heroes are running away with the sword: Gork watched upon us! Or was it Mork?

Traitor! The Possessed Magister confuses one of the Greenskins with his dreadful magic and he attacks the Shaman!

In the end, me and Davide left the field to Michele and his Possessed, which were the only warband without any casualty. We divided the booty: one big shard each (worth 3 Wyrdstone pieces), one little shard to me and one to Michele, and the sword obviously to the Orcs

The followers of Dr. Von Pfalz (Michele's Magister) perched on a building facing the centre of the battlefield and threw arrows every minute of the game to everyone in sight

Group pic in the centre of the table

The Dwarves suffered from their slow Movement and close the game with 3 pieces of Wyrdstone, +1 because of their Treasure Hunters' abilities. Same result as the Possessed, in the end.

Once we ended the game, we read that the sword... could cause the daemonic possession of the bearer! My Boss would have to pass a LD test every turn to not attack the first model in sight screaming he was the herald of the Shadowlord. Sigh. However, we left the sword to the Greenskins (I renounced to my additional exploration die to make amend), which sold it for 100 GC (💰). Michele wanted the sword for himself, because Possessed can equip it being a Chaos weapon.

The story could have ended there, but we like the story of sword too much to left it unplayed. So we thought of a narrative campaign built around the search for the sold Sword of the Herald: everyone wants the Sword, first of all the Possessed, for which it will be the key to the Shadowlord himself...

The Sword of the Herald token is ready-made for the campaign!

Posted on Sunday, November 14, 2021Last update

A Tale of Dark Age in Southern Italy #3

Third and last DBA game played by me and Frontlineminiaturist on a Saturday afternoon. Since now, 1-1 Byz to Lon, but there shall be only one winner at the end.

For a catch up: first game here, second game here.

NB: we took better pics for this game, clearly a sign of improvement, so we can actually track everything happened.

***

Army lists 📜

III/21b Italian Lombard, Lombard Army 775-1076 AD

1 x 3Kn (Gen), 4 x 3Kn, 4 x Sp, 1 x 3Bw, 2 x Ps

III/65 Nikephorian Byzantine 963-1042 AD

1 x Cv (Gen), 1 x 4Bd, 4 x Cv, 1 x LH, 3 x 8Bw, 1 x Ps, 1 x 3Ax

Terrain & Deployment 🌳


Lon defends. Frontlineminiaturist chooses a BUA this time, a simple hamlet which goes right next his camp. Terrain is concentrated on the attacker side, with a plough, a gentle hill on Byz left flank and a difficult hill on the right.

Defender deploys as usual: Kn in the centre, Sp on his left, Ps on the right. Objectively, we tried three similar formations in this games, but every time they resulted in something different: how awesome.

Attacker sets his light troops on the difficult hill, and tempts fate with the plough by placing Cv right behind it. In the centre, the 8Bw line with 4Bd reinforcing on left flank.

Battle! 🎲

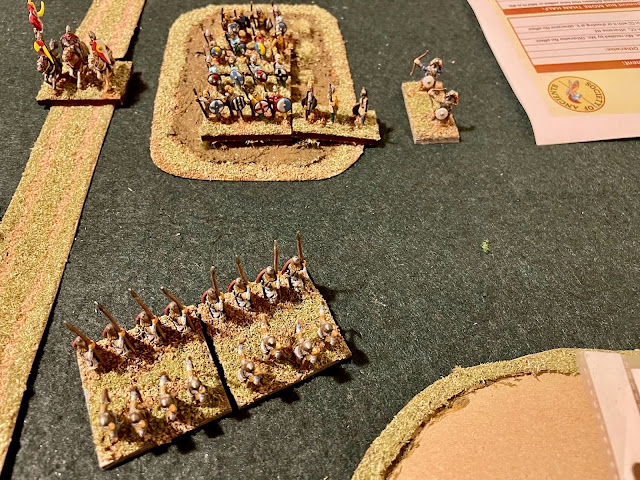
The plough is ok, so Byz can advance with the entire army. LH moves forward to strengthen the infantry line. Lon is worried about the bulk of Byz Cv in front of his Ps, so turns the Kn group towards the enemy flank.

Second turn we still maneuver on the battlefield: Lon go forward with everything but the Sp (damned low PIP's), and Byz send the Cv on the left flank, reinforced by the Gen, while on the right the light foot and an incoming Cv direct on the enemy camp. 

First contact! The hard Kn line impacts on the enemy with rage and lances in rest. Near the hamlet, the Sp finally turns towards the approaching enemy.

First blood for the Lon: Byz Varangian Guard (4Bd) surrenders under the violent blows of the Lombard Knights.

Byz reaction: 8Bw and Gen in the centre close the door on the killer Kn; Cv charges the poor Ps in good going; the other Cv unites with the light troops.

Revenge! Both Lon Kn and Ps are killed. Byz 2 - Lon 1. The Kn, however, pursue against Byz horses: this moves, typical of Knights formation, can be really tough.

For the first time in these three games, Lon Sp actually do something: they attack the Byz formation near the hamlet with a wall of spikes and fury.

And in fact Byz Cv flees from combat. Lon Kn press the enemy almost on the gentle hill.

Game changing turn for the Byz: Cv and Gen closes the door on the rear rank of enemy Kn, and the last Cv charges the Ps in good going. Are we near to victory?

Hooray! Byz 4 - Lon 1 with this nice die rolls. Here ends the last game.

So, the day ends Byz 2 - Lon 1. We had lots of fun, and we hope to play again soon with these armies and their new Frankish friends. More on this later, but my mate and me have new minis on our workbench, perfect to match Byz and Lon. The only possible outcome is a narrative campaign in IXth century Southern Italy...

Posted on Tuesday, November 9, 2021Last update

A Tale of Dark Ages in Southern Italy #2

Second DBA game played by me and Frontlineminiaturist on a Saturday afternoon. After my Byz victory in the first game, his Lon take another shot.

You can find the first game here.

***

Army lists 📜

III/21b Italian Lombard, Lombard Army 775-1076 AD

1 x 3Kn (Gen), 4 x 3Kn, 4 x Sp, 1 x 3Bw, 2 x Ps

III/65 Nikephorian Byzantine 963-1042 AD

1 x Cv (Gen), 1 x 4Bd, 4 x Cv, 1 x LH, 3 x 8Bw, 1 x Ps, 1 x 3Ax

Terrain & Deployment 🌳


Lon defends. They chose two Ploughs, however the dice roll states that all the terrain concentrates on one side of the battlefield.

I change my deployment and prefer a big group in the centre, with 8Bw creating a line with 4Bd; 3Ax, Cv and LH on the left and only Cv on the right. Ps cover the right flank of the group formation.

The damn ploughs are for the second time a bet for the Lon, but Frontlineminiaturist chooses a deployment similar to the first battle: Sp on his left flank, Ps on his right, strong Kn group in the centre.

Battle! 🎲

First turn sees the two armies advance one towards another. This time the ploughs are good going, so Lon can go forward without any problem.

8Bw shoot and kill one Kn element. Sometimes bows are effective!

Knights' charge! Lon try to break through the Byz line.

Byz react by closing the doors on the left with Cv and in the centre with Ps on the Lon General! Cv on the right charges the 3Bw element in the field, but they underestimate them...

In fact, both Cv on the Byz flanks are killed! The closed door on the General, however, results in the losing of the Lon warlord. Score: Byz 3 - Lon 2

Lon assault the isolated 3Ax near the plough on their right flank

And they kill it! Tie, 3-3. The Lon Kn is still pressing the Byz LH

Last photo: Byz charge on every front. Will they succeed?

Unfortunately, not: some bad dies result in recoil in both fronts, Byz of the right (damn!) and Lon in the centre. In the last turn, Frontlineminiaturist's ardent Kn will finally kill the Byz LH, closing the game Byz 3 - Lon 4. One game each. See you next time, filthy Lombard...

Posted on Sunday, November 7, 2021Last update

A Tale of Dark Ages in Southern Italy #1

Yesterday afternoon me and my pard Frontlineminiaturist played three DBA games in a row with his stunning armies of Italian Lombard and Nikephorian Byzantine.

Early in 2021 we beta-tested a little campaign with the same armies, in which I tried to defend my Lombard territories in Southern Italy from the Byzantine invasion of Frontlineminiaturist's imperial forces. It was not bad, but we want to refine the rules before playing again, and maybe add the new 15mm armies we bought along the way.

This time, we played some casual battles just for fun and to see what happened if we swapped the armies: so, I took the Byz and he took the LonCool minis, cool games. Who will win in the end?

***

Army lists 📜

III/21b Italian Lombard, Lombard Army 775-1076 AD

1 x 3Kn (Gen), 4 x 3Kn, 4 x Sp, 1 x 3Bw, 2 x Ps

III/65 Nikephorian Byzantine 963-1042 AD

1 x Cv (Gen), 1 x 4Bd, 4 x Cv, 1 x LH, 3 x 8Bw, 1 x Ps, 1 x 3Ax

Terrain & Deployment 🌳


Byz defends. I'm in Arable terrain, so we chose 2 compulsory Ploughs, a Forest and a Road. We wanted to place a Gentle Hill but we miscast the dice and there was no room for it.

I deploy near to the road, with 4Bd on the centre surrounded by 8Bw. My Cv follows on the left flank, and light troops controls the forest on the right.

Lon take a risk by deploying inside the ploughs, with Sp on my right, Ps on my left and Kn in the centre. Both our Generals are in the backline of the army.

Lombard Knights are a frightening view!

Lombard Spears and 3Bw

The Byz line

The Byzantine General oversees his troops from behind

Battle! 🎲

First dice is 1! Poor Lon: the ploughs are considered bad going

8Bw advancing

The Byz army advances everywhere, and the Lon send the Knights forward while the Spears trudge in the fields.

First contact is made by Lon Kn. Byz 8Bw on the right throw arrows at the enemies and consolidate their position

First blood of the game is for the Lon! Byz LH is wiped out

Lon charge the 8Bw, but Byz close the door on both Lon Kn on the left and Lon 3Bw on the right

No good for the Byz: both combats result in a recoil, and the 3Ax are killed. 8Bw however manage to disband some 3Kn.

Lon Knights close the door on the poor Byz Cv


Unfortunately this is the last photo we took for this game! We didn't register which elements went lost (yeah, we were not the most clever), but we remember a Byz victory in the end. So, 1-0 Byz to Lon for our first game!